Sign up for daily news updates from CleanTechnica on email. Or follow us on Google News!
Our friend Doug recently bought a heat pump water heater and decided to save a good amount of money by installing it himself. We gave him a hand with the installation and were surprised at how relatively easy it was. DIY heat pump water heaters (HPWH) installations could make this game changing decarbonization technology accessible for many more people.
Heat pump water heaters are high impact, yet still largely under-appreciated, climate heroes. In every year of operation, they save 1 ton of CO2 emissions compared to gas water heaters, and $400-$500 in energy bills compared to electric resistance ones. This is enough electricity savings to power an electric vehicle! Best of all, the savings are baked in. Switch out your water heater and voila, suddenly you’re a climate champion every time you take a steamy shower.
While the heat pump water heater market has been growing at a 15-20% clip since ENERGY STAR certification in 2009, as of 2022, only 2% of all water heater sales were heat pumps. Low market penetration means finding a plumber to install one might be a challenge. It also means that the plumbers who do install them may raise their price due to lack of competition or perceived risk of an unfamiliar technology. Installation prices are high in most markets in the US, with only a couple of mature ones (Maine and the Northwest) where installation costs are lower and more accurately reflect the true time and cost.
Given this reality, the DIY heat pump water heater install is a low cost, viable alternative. DIY-ing your HPWH install can save thousands of dollars and take only a couple of hours. In leading HPWHs markets, like the Northwest, up to 53% of HPWHs are self-installed, meaning lots of folks are quietly doing this already. DIY makes HPWHs more accessible by eliminating the hassle of finding a plumber and the currently high installation costs.
Join Electrify Now for a free webinar in October showing a live DIY HPWH installation with a plumber who can answer any questions you might have.
Doug Buys a Water Heater
Our family has proudly installed four HPWHs (one in our Portland house, one in an attached apartment, and two in a Cleveland duplex). For all of them, we’ve used contractors because we didn’t feel comfortable doing the plumbing. However, we still had to research and explain the process in depth to all the installers who were unfamiliar with the technology.
Enter our friend and neighbor, Doug, with a 12-year-old water heater (find the age of your water heater) who saw a great deal on a heat pump: $600 for delivery to your door (check out the many rebates available nationally). Rather than wait for an emergency, Doug proactively decided to replace his old water heater.
He called a couple installers and received a quote for $2500, which isn’t bad compared to other stratospheric pricing we’ve seen around the country. But Doug is semi-handy and figured he could install himself and save a couple thousand dollars. He did a little research, borrowed a PEX expander tool, and blocked off a Sunday to do the install. Joe joined to chronicle the adventure and lend a helping hand.
Prep Work
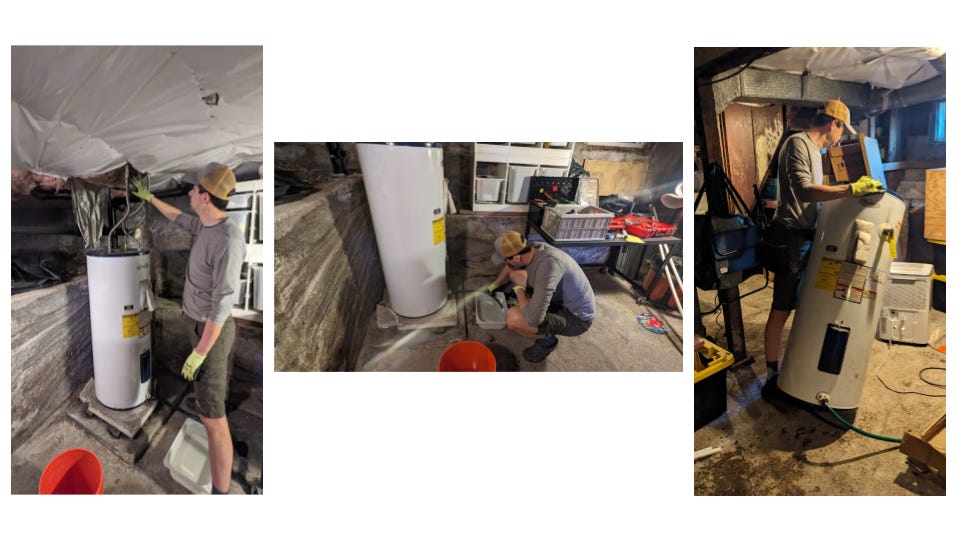
Doug disconnecting, draining and removing his old water heater.
First Doug had to learn a few things about his existing water heater. Because there was no burner or vent coming off it, he confirmed it was electric resistance, like half of all water heaters nationally. These are easier to replace because they don’t require a capped gas line or a new 240-volt electrical wire (though there are now HPWHs that plug into a standard 120 volt outlet making for easy gas replacements).
Through a little online research (Doug’s preferred site was Hot Water Solutions), he made a list of the materials and tools he would need: 1. PEX pipe and connectors, 2. PEX cutting tool, 3. Pad and drain pan for the HPWH, 4. Braided connectors for the water heater, 5. Tube for the condensate drain, 6. Condensate pump, 7. Foam pipe insulation, and 8. Pipe and water heater straps. He already had the required wrenches and he borrowed a PEX expander from a friend. The material for the job came to about $150.
On installation day, Doug turned off the electricity to his current water heater (at the electrical panel) and shut off the water to the house (using a water shutoff handle in his basement). He then drained the water heater (lesson learned: plan for this to take a couple hours). Next, he disconnected the pipes and electrical wires, and the old, inefficient water heater was dragged to the curb to be picked up by a metal recycler.
Installing the New Decarbonizing Water Heater
Doug laid an insulation pad and drain pan so the water heater wouldn’t rest on the concrete floor and risk rust from moisture. Doug and Joe then moved the new heat pump water heater into place — a heavy task best tackled by two people!
Next came the plumbing, the most nerve-wracking part. Doug cut the existing PEX pipe and used the PEX expander to add a connector (see middle picture below). This was the first time we’d ever done this, but we were amazed at how easy PEX pipe was to use. After adding the connector Doug inserted a new PEX pipe, a 90 degree elbow, and another piece of PEX that attached to the braided water heater connector. As novice plumbers, it wasn’t very difficult and went surprisingly smoothly.

Doug set a drain pan, expanded the PEX pipe and added an elbow and other connectors.
Moment of truth: after running new pipes to both the hot and cold inlets, Doug turned the water back on and the water heater started to fill. There were no leaks!
The final steps were attaching a condensate line and a pipe to the pressure relief valve (we reused the one from the old water heater), and connecting the electrical wires. Doug turned on the circuit breaker at the panel, and within a minute, his shiny new HPWH was humming away, happily making hot water in heat pump only mode (the most efficient mode of operation). Later, Doug added earthquake strapping, a small condensate pump, and insulated the pipes and braced them.
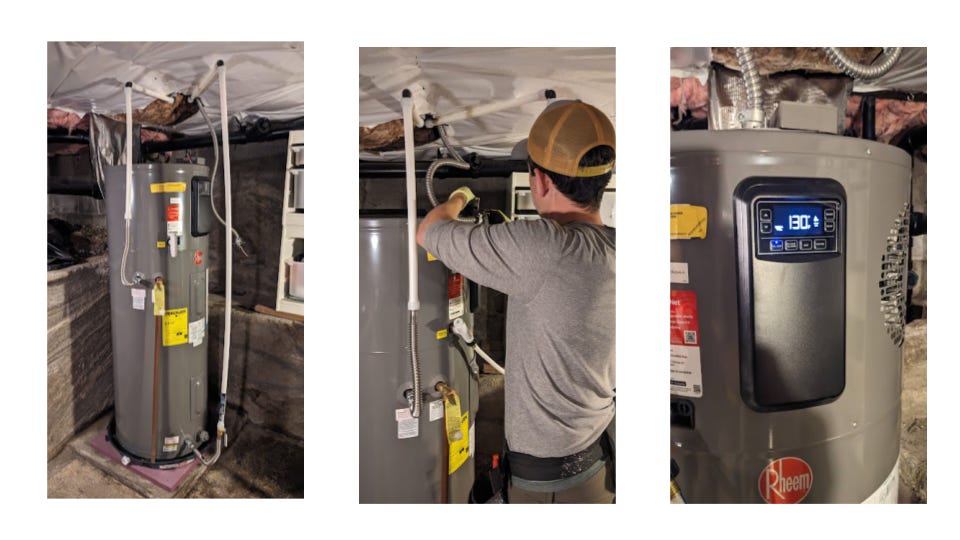
Doug connected both water lines, the electrical wire then turned on his HPWH.
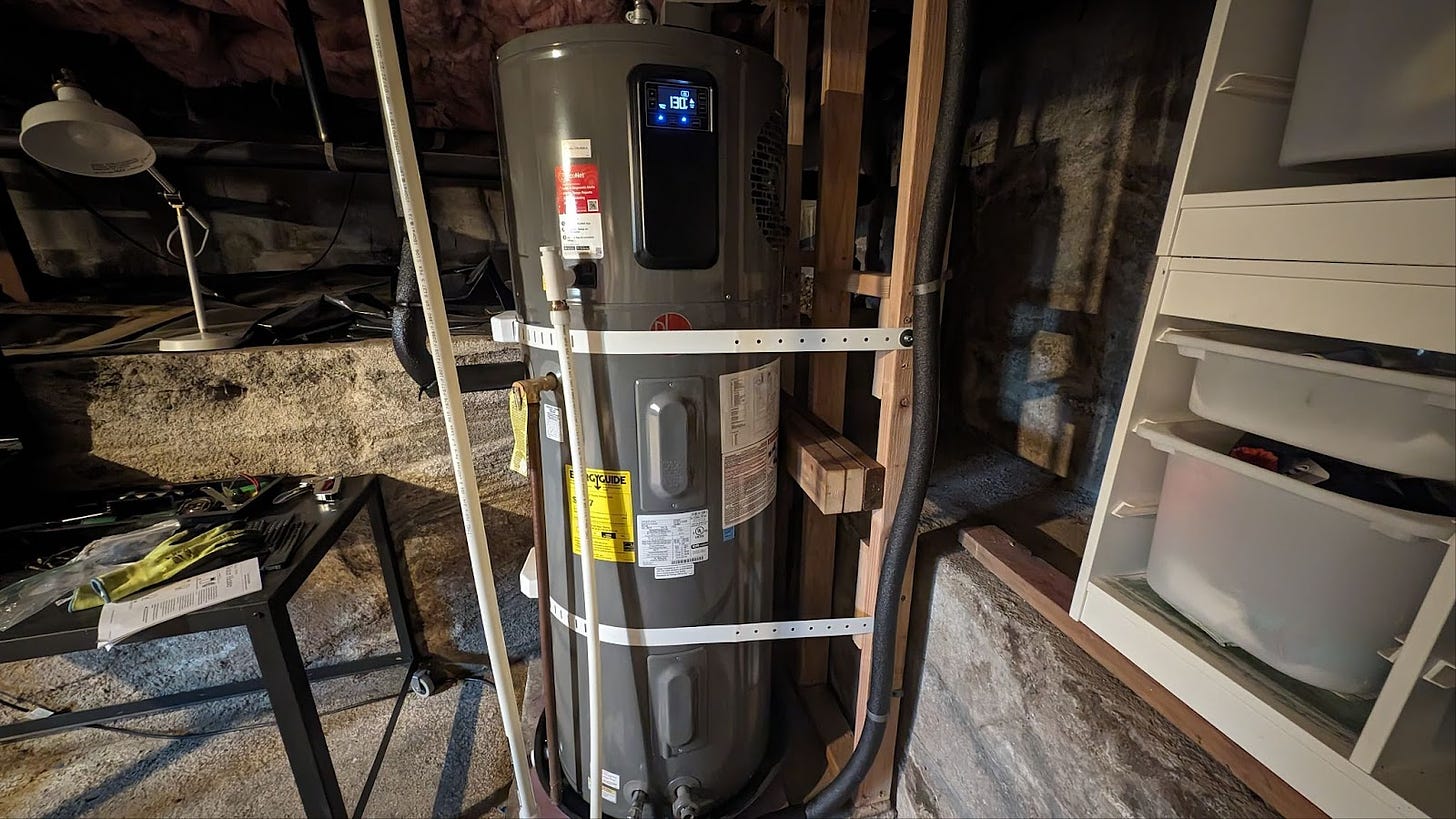
All in, he spent about 3 hours researching, 4 hours installing, and a couple hours on the finishing touches later that week. The fully installed water heater looks like this.
It’s now been operating well for several months, and Doug even noted that the water is hotter than before. Most significantly his home’s electricity use has declined by 30%! He saves about 250 kWh a month, and $300 – $400 a year.
This HPWH adventure proved that a semi-handy person can install a heat pump water heater in 7-10 hours and potentially save thousands of dollars on installation costs. With a little bit of knowledge, research, and a friend to help, DIY installs can bring game-changing heat pump water heaters within reach of the average homeowner, helping decarbonize our homes and lives.
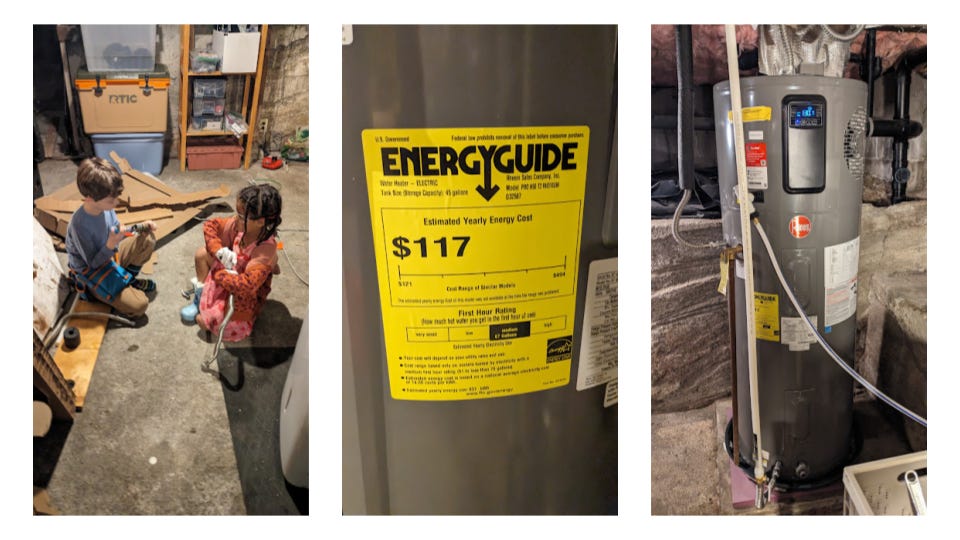
Our young apprentices helped with the install.
Have a tip for CleanTechnica? Want to advertise? Want to suggest a guest for our CleanTech Talk podcast? Contact us here.
Latest CleanTechnica.TV Videos

CleanTechnica uses affiliate links. See our policy here.
CleanTechnica’s Comment Policy

 Christen 1st New Ship Using New Professional IPS To Advance Offshore Wind - CleanTechnica Volvo Penta")

